


Click on the image for licensing terms
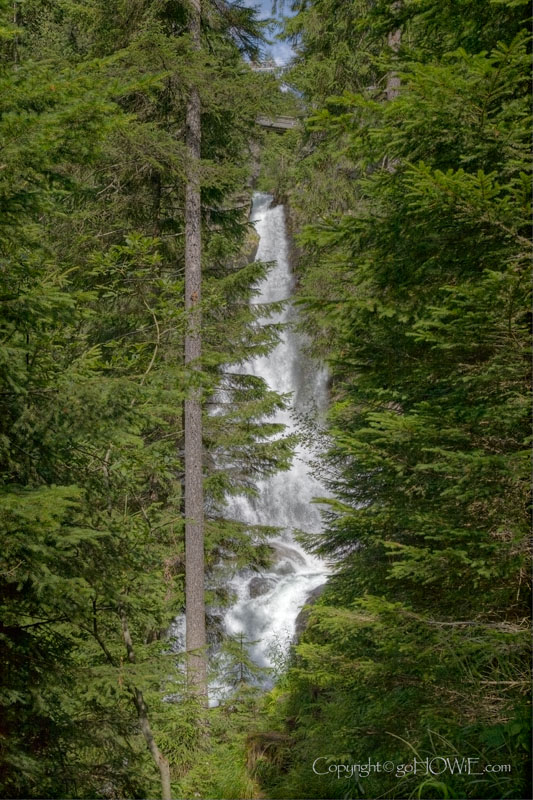
This is another photo of the Riesach Falls, on the 'Wilde Wasser' trail which my wife Liz and I hiked on our holiday in Austria last summer.
I'm using this particular photo to explore further the ways and means of cramming a natural contrast range that is far outside the capabilities of a camera sensor to record in one exposure, into a final image that has both reasonable shadow and highlight details.
This picture is an ideal subject to discuss. Taken in harsh sunlight, the water of the falls is very bright, while the shadows under the trees are very dark. Way too much contrast to fit into the five or so stops available to a digital sensor.
There are six possible techniques to overcome this problem and get a final image whose tonal range is constrained within the bounds of monitor or print, and we'll discuss them in relation to this particular scene.
I use these a lot when I've got a defined horizon to line them up against, like at the seaside. Quick, convenient, but totally useless here as the bright part of the scene is not defined by a straight line.
This is where you take multiple exposures covering the entire tonal range of the scene, and then blend them together in Photoshop using layers and masks. This is the professional way to do it, but in this scene the areas of dark and light are so interwoven that trying to separate them by masking would take forever. No thanks!
As shown in the first image in the sequence above.
For this technique you start with a single exposure that has the highlights just on the verge of blowing out, and then you apply fill light to the shadows using Photoshop's 'Shadow/Highlight' adjustment tool.
This has worked well here, but you have to watch out for unnatural colour shifts and excessive noise in the lightened shadow areas. You never get something for nothing when playing with electrons!
As shown in the second image in the sequence above.
Start with three or more exposures, taken at fixed ev values apart (I normally use 1 stop increments) and then load them in to the 'Exposure Fuse' function of Photomatix Pro. This isn't true 32bit HDR, but there's still quite a lot of scope for adjustment of the exposure blend using this technique, and you avoid the strange noise artifacts you sometimes get from full 32bit HDR rendering.
As shown in the third image in the sequence above.
Again, start with three or more images at different exposures and use them to create a full 32bit HDR file in Photomatix Pro. This 32 bit HDR file looks terrible in its unprocessed state, but contains all the tonal information from the multiple exposures used to create it.
How? 'Modern technology gentlemen', to quote Rufus in Bill and Ted's Excellent Adventure.
There are two ways to process this HDR file into something that looks like a photo, and the third image in this sequenece was processed using the 'Tone Mapping' option in Photomatix Pro.
As shown in the fourth image in the sequence above.
Starting with the same 32bit HDR file, but this time using the 'Tone Compressing' function in PhotoMatix Pro. This gives a slightly different rendition to the image than the alternative 'Tone Mapping' method.
So which is best? Well it's very much 'horses for courses' when it comes to squeezing the tonal range of a high contrast scene into something that can be viewed or printed.
However, for this particular image I must say that I prefer the look of the non-HDR Adobe Photoshop shadow/highlight adjustment tool (the first image in the sequence), it just seems to give a more natural look to the final picture in this case.
Take a look at the images at high res by clicking on the thumbnails and see what you think.
Filename - waterfall 22a.jpg
Camera - Canon 5D
Lens - 24-105mm zoom @ 45mm
Exposure - 1/200sec @ f11, ISO100
Location - Riesach waterfall, Austria
This image - 533x800px JPEG
Conversion - ACR & PS-CS2
Comments - HDR processing used to control contrast.
All content copyright © Howard Litherland 2009-2026 unless otherwise stated.